


Beginner Friendly DIY Projects for a Cosy Home
There is a particular kind of comfort in a home that has been quietly shaped by hand. It is not about perfect lines or expensive furniture, but about the small, human details: a string of bunting above a bed, a cushion plumped in the corner of the sofa, a plant pot that echoes the colour of your kitchen tiles. The good news is that you do not need a workshop, a sewing machine or a degree in interior design to create any of it. You need an afternoon, a few affordable materials and a willingness to make something slightly wonky at first.
Why handmade touches make a room feel warmer
Mass-produced decor is designed to appeal to everybody, which is precisely why it can leave a room feeling a little flat. When you make something yourself, you introduce choices that only suit your home: the exact shade you mixed, the fabric you fell for at a car boot sale, the size that fits that awkward gap beside the fireplace. That personal match is what makes a space feel settled rather than staged.
Making things also changes how you see your rooms. Once you have spent an hour choosing trim for a cushion, you start noticing what else might be tweaked. Start small. A single finished project will teach you more than any mood board.
Before you begin: the beginner's toolkit
None of the projects below require specialist equipment. Gather these basics and you can tackle all three:
- Sharp fabric scissors and, if possible, a pair of pinking shears for neatening raw edges
- Fusible hemming web and a tube of strong fabric glue for no-sew work
- An iron and ironing board, which matter far more than most people expect
- A tape measure, chalk pencil and pins for marking up fabric
- Fine sandpaper, a small brush and matte varnish for painted pieces
Charity shops, car boot sales and the remnant bins of local fabric shops are wonderful sources of cheap material. Old linen curtains, cotton shirts and heavyweight bedding can all be cut up and given a second life.
Fabric bunting from leftover scraps
Bunting is the friendliest sewing project there is, and you can just as easily glue it together. Cut paper or card into a triangle roughly 20cm across the top and 24cm deep, then use it as a template. You will need about twelve flags for a two-metre run. If you are not sewing, cut the fabric with pinking shears so the edges do not fray, and leave a small allowance.
For a sewn version, place two triangles right sides together and stitch along the two long sides, then turn and press. Arrange the flags along a length of 2.5cm-wide bias binding, leaving 5cm gaps between them and 50cm of free binding at each end for tying. Fold the binding over the top edge of each flag and stitch or glue firmly in place. A run of bunting above a bedhead, across a window or over a fireplace instantly softens a hard, bare space.
Hand-painted plant pots
Terracotta and plain plastic pots are inexpensive and take paint beautifully. Begin by wiping the pot clean and sanding the surface lightly so the paint has something to grip. Two thin coats of chalk paint or exterior masonry paint will give good coverage; leave each coat to dry properly rather than slapping on one thick layer.
For pattern, masking tape is your friend. Horizontal stripes, a painted band around the rim, or simple dots made with the end of a pencil eraser all look deliberate and charming. Paint a little of the colour on the inside of the rim too, so it reads clearly when you look down into the pot. Finish with a coat of matte varnish and leave it to cure for a day before using it.
Here is the practical trick: use your painted pot as a cover pot. Drop a plastic nursery pot inside so you never have to worry about watering damaging your handiwork. Group three pots together in the same palette for a display that looks curated rather than cluttered.
No-sew cushions you can make in an afternoon
Measure your cushion pad, then add 2cm to each side for your fabric squares. For a 45cm pad, cut two 49cm squares. Press them well, because crisp fabric behaves far better than crumpled fabric.
Place the squares right sides together. Run a strip of fusible hemming web along three edges, sandwiching it between the layers, and press with a hot iron following the packet instructions. Turn the cushion the right way out, push out the corners gently with a pencil, and press again. Insert the pad, then close the final edge with a row of small webbing squares or a simple hand-sewn ladder stitch. Mixing a plain linen with a patterned cotton on the reverse gives you two cushions in one.
Styling your makes for maximum cosiness
Once you have a few pieces finished, resist the urge to scatter them around. Group in threes, layer textures such as wool, linen and rattan, and keep lighting low and warm. Bulbs around 2700K or below flatter handmade pieces far better than harsh white light, and a couple of candles or a small lamp in the corner will do more for atmosphere than any large overhead fitting. Rotate your makes with the seasons, storing bunting and lighter fabrics away in summer and bringing them back when the evenings draw in. That gentle change keeps a handmade home feeling alive all year round.


Cosy Interiors
-
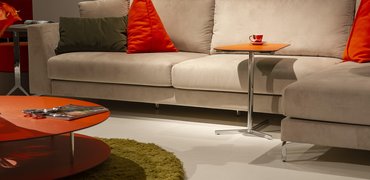
Bring the outside in with pinecones, dried stems and linen napkins for simple table displays that change with the seasons.

Home Comforts




-

Long established fact that a reader will be distracted
-

Long established fact that a reader will be distracted
-

Long established fact that a reader will be distracted



Small Spaces
Karla Gleichauf
12 May 2017 at 05:28 pm
On the other hand, we denounce with righteous indignation and dislike men who are so beguiled and demoralized by the charms of pleasure of the moment
M Shyamalan
12 May 2017 at 05:28 pm
On the other hand, we denounce with righteous indignation and dislike men who are so beguiled and demoralized by the charms of pleasure of the moment
Liz Montano
12 May 2017 at 05:28 pm
On the other hand, we denounce with righteous indignation and dislike men who are so beguiled and demoralized by the charms of pleasure of the moment